Lensing
vfx
photography
As light passes through a camera lens, it does not stay perfect. The glass stack, aperture, coatings, and matte box all imprint artifacts on the image: soft focus falloff, dark corners, geometric warps, color fringes, flares, haze, and grain (or noise).
Matching those artifacts when you integrate CG or elements into a photographed plate — or adding a coherent lens package on a full-CG shot — is essential to photorealism. One effect alone will not “complete the picture.” A full, ordered lensing setup is greater than the sum of its parts.
Every compositor should understand a little photography: how light interacts with a lens, and in what order those effects happen.
Depth of field
Real lenses only focus a limited depth range. Subjects outside the focus plane go soft; bright out-of-focus points become bokeh shaped by the aperture.
In the renderer vs in comp
A majority of the time DOF is achieved with the zDefocus node in comp. Most render engines do provide ray traced depth of field, however this will often dramatically slow down rendering and is irreversible.
Nuke tools
ZDefocus— depth-driven blur from a Z channel; workhorse for many shows.pgBokeh(now Bokeh) — more photographic bokeh shapes, blades, cat-eye, etc.
What to match
- Focus plane and how it moves (rack focus)
- Blur amount vs distance (not a single constant blur on “background”)
- Bokeh shape (round vs anamorphic oval, blade count)
- Edge quality: highlight bloom inside the bokeh, not just a Gaussian mush
Diffraction and “expensive glass”
Diffraction is a wave effect: light bends at hard edges (especially a small aperture). On image, you get a slight overall softening and characteristic rings/spikes on bright points when stopped down hard.
Vignette
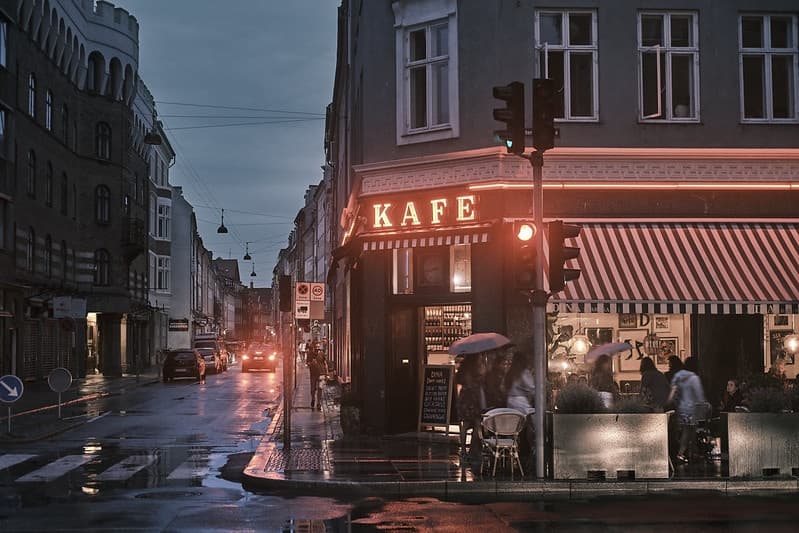
Vignetting is caused by the physical dimensions of a multi-element lens. Rear elements are shaded by elements in front of them, which reduces the effective lens opening for off-axis light. The result is a gradual decrease in light intensity toward the image periphery.
So: corners go darker than the center — sometimes mildly, sometimes dramatically.
For a vignette in comp, build a soft radial (or slightly oval / anamorphic) darkening that matches the plate:
- Strength
- Shape (circular vs stretched)
- How early it starts from center
- Whether it is pure exposure loss or also a slight desat / cool-warm shift
Nuke: Grade with a radial mask, Vignette gizmos, or a soft circular ramp. Match by exposing up the plate and your comp — corner mismatch becomes obvious.
Lens distortion
Lenses map the 3D world onto a flat sensor with geometric distortion. Straight lines may bow. Focal length, lens design, and zoom position all change the warp.
Studio practice
Most large facilities measure every show lens (or lens + zoom position) and publish distortion grids / STMaps. Tracking, layout, and paint all work in a known geometric space.
If you do not have a package:
- Photograph or request a lens grid
- Or use Nuke
LensDistortion— manual, grid-based, or line/point analysis
Curvilinear vs rectilinear
Type | Character | Where you see it |
|---|---|---|
Curvilinear | Straight lines bow (classic barrel/pincushion “fisheye-ish” behavior at extremes) | Most real photographic / cinema lenses have some residual curvilinear distortion |
Rectilinear | Designed to keep straight lines straight (wide rectilinear architecture lenses, many CG default cameras) | Idealized; CG cameras are often perfectly rectilinear until you add distortion |
Most live-action plates you get were shot on real glass with measurable distortion. A default CG camera is a perfect pinhole / rectilinear model until you tell it otherwise.
Critical pipeline rule
Apply lens distortion to CG (and full-CG packages) to match the plate — do not distort the plate to match undistorted CG as your default.
Typical flow:
- Undistort plate only when the pipeline requires it (e.g. for tracking/paint in a linear space), with a documented STMap.
- Integrate / render CG in the same geometric convention the show uses (often “undistorted working space”).
- Redistort CG (or the whole stack) with the show lens map before delivery so it sits on the plate’s geometry.
Always distort CG → plate geometry.
Lens flare
Flares are internal reflections and scatter between lens elements, coatings, and the sensor stack. Bright sources (sun, practicals, speculars) kick ghosts, veils, and colored blobs along the optical axis.
- Not random decoration — they should be motivated by something bright in frame or just out of frame.
- They move with the source relative to the lens center.
- Anamorphic flares streak; spherical flares ghost differently.
Tools
The common production hammer in Nuke / After Effects is Optical Flares (Video Copilot). Shows also use proprietary tools, CG flare cards, or plate-shot practical flares.
Match:
- Color temperature of the source
- Aperture shape in the flare structure
- Intensity under the show LUT / ODT (easy to overdo in linear)
A huge flare on a plate that has none (or the wrong shape) looks like a plugin demo, not a camera.
Fringing
Fringing usually means a bright or colored halo along high-contrast edges — not always full longitudinal CA, but related.
Causes / looks:
- Optical chromatic effects at contrast boundaries
- Sensor / demosaic edge artifacts
- Over-sharpening in camera or plate processing
- Bloom from highlights bleeding into darks
In comp, mild edge fringing can help CG sit in a plate that already has it. Sample the plate at similar contrast edges and keep it subtle.
Chromatic aberration
Chromatic aberration is wavelength-dependent focusing and magnification. Different colors do not land on the same sensor position → color fringes along edges (often cyan/magenta or red/blue).
Common where:
- High contrast (bright sky against dark silhouette, metal edges)
- Wide open or cheap wide lenses
- Image corners more than center (lateral CA)
In VFX
- Split RGB slightly radially or directionally; or use a dedicated CA / fringing tool.
- Match the plate — amount, direction, and which edges show it.
- Full-CG shots: a little CA sells “glass”; too much looks like a phone panorama gone wrong.
Chromatic aberration is usually a late, subtle layer after defocus, not a substitute for good focus matching.
Matte box effects (pro-mist and friends)
The matte box holds filters in front of the lens. Filters are part of the optical path, not a grade.
Pro-mist (and similar diffusion)
A pro-mist (or black pro-mist, pearlescent, etc.) softens specular, lifts shadows slightly, and blooms highlights. Cinematographers use them for skin and “cinema” texture.
For VFX:
- If the plate was shot with diffusion, clinical-sharp CG will never sit.
- Match with mild glow / bloom on highlights, slight global softening, or a dedicated diffusion tool — after integration, before or with grain depending on show taste.
- Strength should match distance and stop: diffusion looks different wide open vs stopped down.
Other matte-box / filter looks: polarizers (sky/reflections), ND (exposure only, not a “look” by itself), streak filters, nets.
Grain (and digital noise)
Grain should be among the final steps of any composite (often the last creative step before or after a delivery transform, per pipeline).
Why last:
- Grain is high-frequency; blurs and reformats after grain destroy the match.
- Keys, warps, and grades should not cook grain differently per layer.
- CG is usually too clean; plate grain (or matched synthetic grain) unifies the stack.
See the Tech Check lesson for grain matching and a high-pass grain check. Link the interactive checklist: /tech-check.
Film grain ≠ digital noise, but the job is the same: match the plate’s frequency, amount, and channel balance.
Full-CG vs plate integration
Situation | Lensing goal |
|---|---|
CG into plate | Match this plate’s DOF, CA, vignette, grain, residual distortion, diffusion |
Full-CG shot | Invent a coherent lens package (focal length, stop, glass character) and apply it consistently across the sequence |
Mixed | Same lens model as neighboring live-action shots |
Full-CG without lensing looks like a render. Full-CG with random uncorrelated flares, grain, and distortion still looks like a render. One story for the lens.
Practical checklist
- Lensing is late in the graph (not buried under keys)
- DOF matches focus plane, amount, and bokeh character
- Micro-contrast / diffusion matches glass + filters
- Vignette matches plate corners (check with exposure up)
- Distortion: CG follows plate / show STMap — plate not casually warped to CG
- CA / fringing subtle and plate-matched on high contrast
- Flares motivated and timed to sources
- Grain / noise last and matched
- All of the above viewed under the show OCIO view / LUT
Quick reference
Effect | Physical cause | Comp note |
|---|---|---|
Depth of field | Limited focus range + aperture | |
Diffraction / soft glass | Aperture & optics | Match softness; don’t oversharpen CG |
Vignette | Off-axis illumination / element shading | Radial exposure falloff |
Distortion | Lens mapping | Measure; redistort CG to plate |
Flare | Inter-element reflections | OpticalFlares / practicals; motivated |
Fringing | Edge halos / partial CA | Subtle; high contrast only |
Chromatic aberration | Wavelength-dependent optics | Split RGB; plate-match |
Pro-mist / filters | Matte box glass | Bloom + soften; match plate |
Grain | Film / sensor noise | Last step; match frequency |
Summary
- Lensing is the set of optical fingerprints a real camera leaves on an image.
- Match them for plate work; design a consistent package for full-CG.
- Apply late, in an order that respects the camera path.
- Distort CG to the plate, not the plate to perfect CG.
- Grain last. DOF, vignette, CA, diffusion, and flares only work if they agree with the plate under the show viewer.